To wall mount a Sharp TV, follow these steps: make sure you have the necessary tools, locate the studs on the wall, mark the bracket placement, securely attach the bracket to the wall, and finally, hang the TV onto the bracket.
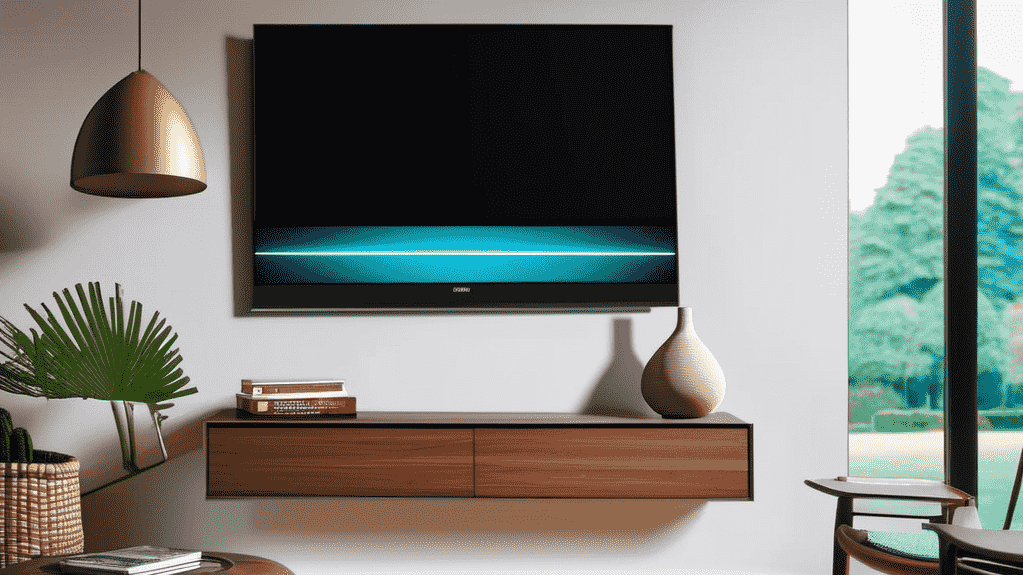
Wall mounting your Sharp TV not only saves space in small rooms but also offers improved viewing angles and optimal placement. Additionally, it adds a touch of modernity and enhances the overall aesthetics of your space. By following these steps, you can enjoy a clutter-free and visually appealing entertainment setup that optimizes your TV viewing experience.
This guide will also walk you through the process, ensuring a safe and secure installation. So, let’s dive in and learn how to wall mount your Sharp TV properly, step by step.
Benefits Of Wall Mounting A Sharp Tv
Mounting your Sharp TV on the wall offers several advantages that can enhance your viewing experience and transform the look of your space. Let’s explore the benefits in detail:
Space-Saving Solution For Small Rooms:
- Wall mounting your Sharp TV is an ideal solution for small rooms and tight spaces. By attaching it to the wall, you free up valuable floor space, allowing for better utilization of the room.
- Having your TV mounted on the wall eliminates the need for a bulky entertainment center or TV stand, making your space appear more open and spacious.
Better Viewing Angles And Optimal Placement:
- With a wall-mounted Sharp TV, you have the flexibility to achieve the perfect viewing angle. You can position the TV at eye level, ensuring a comfortable and immersive viewing experience.
- By mounting the TV on the wall, you can also adjust its tilt or swivel to eliminate glare and achieve the best picture quality. This eliminates the need to compromise on optimal placement due to limitations imposed by furniture or room layout.
Enhanced Aesthetics And Modernized Look:
- Wall mounting your Sharp TV provides a sleek and modernized look to your living space. With no visible cables and a clutter-free setup, your room instantly becomes more aesthetically appealing.
- The minimalist appearance achieved by wall mounting enhances the overall ambiance and style of your room. It allows your TV to blend seamlessly with the decor, creating a more harmonious and visually pleasing environment.
Factors To Consider Before Wall Mounting
Before wall mounting a Sharp TV, there are important factors to consider. Ensure you have the appropriate wall mount, proper placement for optimal viewing, and secure installation to avoid any accidents or damage. Take measurements, consider the TV’s weight, and follow manufacturer instructions to ensure a successful wall mount.
Choosing The Right Wall Mount For Your Sharp Tv:
- Consider the VESA mounting pattern of your Sharp TV, which determines the compatibility with wall mounts. Check the TV’s user manual or measure the distance between the mounting holes in millimeters.
- Take into account the weight of your TV and ensure that the wall mount you choose can support its size and weight.
- Decide between a fixed, tilting, or full-motion wall mount based on your viewing preferences.
- Determine if you want your TV to be flush with the wall or if you prefer the flexibility of a wall mount that allows for adjusting the viewing angle.
Determining The Ideal Height And Positioning:
- Take measurements to find the optimum viewing distance for your TV, taking into consideration the screen size and aspect ratio. This can help determine the ideal height for wall mounting.
- A general rule of thumb is to mount the TV at eye level when seated. However, you may need to consider the layout of your room and the placement of other furniture.
- Make sure to factor in any potential glare or reflections from windows or lights when deciding on the positioning of your TV.
- Consider the viewing angles from different areas in the room to ensure a comfortable viewing experience for everyone.
Assessing The Wall Structure And Feasibility:
- Determine the type of wall you have and ensure it can support the weight of the TV and wall mount. Drywall may require additional support, such as a stud finder to locate wall studs for secure mounting.
- If mounting on a brick or concrete wall, use appropriate anchors or masonry screws to securely fasten the wall mount.
- Consider the accessibility of power outlets and cable connections for your TV, as well as concealing cables for a clean look.
- Check for obstacles like electrical wiring or plumbing behind the wall before drilling any holes.
By considering these factors before wall mounting your Sharp TV, you can ensure a secure and optimal viewing experience. Remember to choose the right wall mount, determine the ideal height and positioning, and assess the wall structure and feasibility for a successful installation.
Essential Tools
Learn how to wall mount your Sharp TV with these essential tools. Whether you’re a beginner or experienced, this step-by-step guide will help you achieve the perfect placement for your TV.
- Stud finder: One of the essential tools for wall mounting a Sharp TV is a stud finder. This device helps locate the studs in the wall, ensuring a secure mount for your TV. By using a stud finder, you can avoid accidentally drilling into cables or causing damage to the wall.
- If a stud is not conveniently located, consider alternative methods such as using toggle bolts or wall anchors.
- Screwdriver set: A reliable screwdriver set is necessary to tighten and secure the TV mount to the wall. Ensure that you have a set with different screwdriver sizes to accommodate the specific screws needed for your TV bracket.
- Level: To achieve a straight and balanced TV mount, a level is crucial. It helps you check if the TV mount is perfectly aligned horizontally and vertically. This will ensure optimal viewing experience without any tilting or crookedness.
- Tape measure: Measuring the correct distances and dimensions is key to a successful wall mount. A tape measure allows you to determine the accurate height positioning and spacing for your TV. It helps ensure that your TV is mounted at an ideal viewing height for comfort and visibility.
Remember, having these essential tools at hand will make the wall mounting process much easier and efficient. They are necessary to achieve a secure, level, and aesthetically pleasing mount for your Sharp TV.
Carefully Unpacking The Sharp Tv And Removing Any Packaging Materials
To begin, carefully unpack your Sharp TV, ensuring that you remove any packaging materials. This will prevent any potential damage to the TV during the installation process. Take your time to unwrap the TV and set aside all the necessary components.
Identifying The Vesa Mounting Hole Pattern On The Back Of The Tv
The VESA mounting hole pattern refers to the standardized measurement system used for mounting TVs. Locate the VESA mounting holes on the back of your Sharp TV. These holes allow you to attach the TV to the wall mount securely.
Take note of the specific VESA pattern for your TV model, as this information will be crucial when choosing a compatible wall mount.
Locating The Stud Using A Stud Finder And Marking Its Position On The Wall
By carefully unpacking the TV and removing any packaging materials, identifying the VESA mounting hole pattern on the back, and locating the stud using a stud finder and marking its position on the wall, you are now ready to move on to the next step of wall mounting your Sharp TV.
Attaching The Wall Mount Bracket To The Wall Using Screws And Anchors:
To attach the wall mount bracket securely to the wall, follow these steps:
- Position the bracket against the wall at the desired height.
- Use a pencil to mark the spots where you’ll be drilling.
- Ensure that the bracket is level by using a reliable level tool. This will help prevent any tilting or imbalance once the TV is mounted.
- Once the bracket is level, make holes in the marked spots using a drill. Ensure these holes are suitable for the screws and anchors you have chosen.
- Insert the anchors into the holes you’ve drilled. These anchors provide extra support, especially if you’re mounting the TV on a drywall.
- Line up the bracket with the drilled holes and countersink the screws into the anchors. Tighten them securely, ensuring the bracket is firmly attached to the wall.
Ensuring The Bracket Is Level Using A Level Tool:
The levelness of your wall mount bracket is crucial to ensure that your TV is mounted straight and secure. Here’s how to ensure your bracket is level:
- Place the level tool on top of the bracket.
- Check the bubble indicator. If it’s centered between the two lines, your bracket is level.
- If the bubble is off-center, adjust the position of the bracket until the bubble aligns with the center. This will ensure a perfectly level mount for your TV.
Double-Checking The Stability And Secureness Of The Bracket:
Once the bracket is attached and level, it’s essential to check its stability and ensure it’s securely mounted. Follow these steps to double-check:
- Give the bracket a gentle shake to test for any wobbling or movement. If there is any, it may indicate that the bracket isn’t attached securely.
- Inspect each screw and anchor to make sure they are tightened properly.
- Check the weight capacity of your bracket and compare it with the weight of your Sharp TV. Ensure that the bracket can support the TV’s weight without any issues.
Once you have completed these steps and are satisfied with the stability, alignment, and positioning of your Sharp TV, then follow the these instructions:
Attach the TV Brackets
Attach the TV brackets to the back of your Sharp TV. Ensure that the brackets align with your TV’s VESA mounting pattern. Secure the brackets firmly using the screws provided in the wall mount kit.
Mount the TV
With the help of a friend or family member, lift the TV and hook the TV brackets onto the wall plate attached to the wall. Carefully slide the TV into place, ensuring it’s level and secure.
Cable Management
Cable management is an essential part of wall mounting a Sharp TV. Organize and conceal cables to ensure a clean and professional-looking installation.
Organizing And Concealing Cables Using Cable Management Accessories:
- Begin by gathering the necessary cable management accessories such as cable clips, cable raceways, and cable sleeves to streamline and hide the cables effectively.
- Use cable clips to secure the cables to the wall or the back of the TV. These clips help in preventing the cables from hanging loosely, reducing the risk of tripping hazards and creating a neat appearance.
- Cable raceways, which are adhesive strips designed to hold and conceal cables, can be installed horizontally or vertically along the wall. These raceways provide a hidden pathway for the cables, preventing them from being seen and keeping them out of sight.
- Another option is to utilize cable sleeves, which are flexible tubes that gather multiple cables together. These sleeves can be easily wrapped around the cables, creating a unified and organized look. You can further secure the sleeves with zip ties or Velcro straps to keep them in place.
- Ensure that you route the cables behind the TV in a way that minimizes tangling and ensures they are not visible from the front. Consider utilizing cable management accessories specifically designed for routing cables neatly.
- Use cable management solutions that offer easy access to the cables in case any changes or adjustments are required in the future. This will save you from the hassle of removing or reinstalling the entire cable management system.
Routing And Securing Cables To Prevent Tangling Or Visibility:
- Start by identifying the optimal path for routing the cables from the TV to the source devices such as a cable box, Blu-ray player, or gaming console. Choose the shortest and most direct route to reduce cable clutter and minimize visibility.
- Use cable ties or Velcro straps to bundle the cables together securely. This will prevent them from getting tangled and make it easier to manage and conceal them.
- In addition to securing the cables, consider using cable clips or adhesive hooks to affix the bundled cables along the wall or furniture. This will help keep the cables in place and prevent them from sagging or dangling.
- If the cables need to run horizontally along the wall, consider using cable raceways. These can be painted to match the color of the wall, effectively blending them in and making them less noticeable.
- Ensure that the cables are adequately spaced and organized, avoiding tight bends or twists that might lead to signal degradation or damage to the cables.
- Finally, double-check the routing and securing of the cables to ensure they remain hidden and do not interfere with the TV’s installation or any other components.
Testing All Cable Connections And Ensuring They Are Functioning Properly:
- Once the cables are organized and concealed, it is essential to test all the connections to ensure everything is functioning properly. Follow these steps to test the cable connections:
- Start by turning on the Sharp TV and all connected source devices. Verify that the TV is receiving a signal from the devices, such as cable TV, Blu-ray player, or gaming console.
- Use the TV remote to switch between different sources and verify that the signal is being correctly transmitted. Check for any picture or sound issues that might indicate a faulty connection.
- Test each cable individually by unplugging and reconnecting them. Pay close attention to HDMI and audio cables, which are typically essential for full functionality. Ensure they are securely connected on both ends.
- If any connection issues arise, first inspect the cables for any visible damage or loose connections. Replace any defective cables to resolve the issue.
- Run a channel scan on the Sharp TV to ensure all available channels are detected and properly tuned. This will help identify if there are any signal problems that need addressing.
- Once the connections have been tested and verified, perform a final check to ensure all cable connections are secure, hidden, and functioning correctly.
With these cable management practices and thorough testing, you can enjoy your newly wall-mounted Sharp TV with a clutter-free and visually appealing setup.
Preventing Overheating Issues
To prevent overheating issues when wall mounting a Sharp TV, ensure proper ventilation by leaving space around the TV, avoid blocking any vents. Additionally, regularly clean the TV and its surroundings to prevent dust accumulation that can hinder heat dissipation.
Leaving Space For Proper Ventilation Behind The Wall-Mounted Tv:
- It’s crucial to create enough space for proper airflow behind your wall-mounted Sharp TV. This helps prevent overheating issues and ensures optimal performance.
- Ensure there is at least a 4-inch gap between the back of the TV and the wall. This space allows air to circulate effectively, keeping the TV cool.
- Use a wall mount that provides sufficient clearance for ventilation. Check the product specifications or consult the manufacturer if necessary.
Avoiding Blocking The Air Vents With Any Objects Or Decorations:
- Blocking the air vents on your Sharp TV can lead to overheating and potentially damage the internal components. It’s important to avoid this to maintain the TV’s longevity.
- Make sure not to place any objects such as picture frames, shelves, or decorations directly in front of the air vents.
- Keep the area around the TV clear of clutter to prevent any accidental blockage of the vents.
- If you notice the vents are covered, promptly remove any objects that may obstruct the airflow.
Remember, proper ventilation is essential for your wall-mounted Sharp TV to operate efficiently and avoid overheating issues. By allowing space behind the TV and avoiding the obstruction of air vents, you can ensure optimal performance and prolong the lifespan of your television.
Regular Inspection And Tightening
Regular inspection and tightening of your wall-mounted Sharp TV is essential to ensure its stability and prevent accidents. Make sure to regularly check the screws and brackets, ensuring they are secure and tight to keep your TV safe and secure on the wall.
Here are some steps you can follow:
- Inspect the wall mount and brackets visually to identify any loose screws or signs of instability.
- Gently tighten any loose screws using a screwdriver to ensure the TV remains securely mounted on the wall.
- Use a level to make sure the wall mount is still properly aligned and adjust if necessary.
- Check the brackets for any shifts or movement and tighten them as needed.
- Ensure that all the connections between the TV and the wall mount are secure and properly fitted.
Regular inspection and tightening of the wall mount and brackets will help prevent any accidents or damage to your TV. It is recommended to perform these checks every few months or whenever you notice any instability or loose screws. By giving proper attention to maintaining the wall mount, you can enjoy a hassle-free and securely mounted Sharp TV.
Frequently Asked Questions Of How To Wall Mount A Sharp Tv?
How Do You Wall Mount A Sharp Tv?
To wall mount a Sharp TV, start by choosing the right wall mount and locating the studs. Then, attach the mounting brackets securely and hang the TV.
What Tools Do I Need To Wall Mount A Sharp Tv?
You will need a stud finder, a drill, a level, a screwdriver, and the appropriate wall mount kit for your Sharp TV model.
Can I Mount My Sharp Tv On Any Wall?
Yes, you can mount your Sharp TV on any wall as long as it can support the weight of the TV and has accessible electrical outlets.
How High Should I Mount My Sharp Tv On The Wall?
For optimal viewing experience, mount your Sharp TV at eye level when seated, with the center of the screen at eye level.
Can I Mount A Sharp Tv On A Brick Wall?
Yes, you can mount a Sharp TV on a brick wall, but you will need additional tools like a masonry drill bit and anchors suitable for brick.
How Much Weight Can A Wall Mount Hold?
The weight capacity of a wall mount depends on the specific model. Ensure the wall mount you choose can support the weight of your Sharp TV.
Can I Install A Wall Mount By Myself?
Yes, you can install a wall mount for your Sharp TV by yourself, but it is recommended to have someone assist you to ensure safety and accuracy.
Do I Need Professional Help To Mount My Sharp Tv?
If you are unsure about mounting your Sharp TV or lack the necessary tools and skills, it is advisable to seek professional help for a proper installation.
Can I Use The Existing Wall Mount For My New Sharp Tv?
If the existing wall mount is compatible with your Sharp TV’s VESA pattern and weight, you may be able to reuse it. Check the compatibility specifications.
How Do I Hide The Cables When Wall Mounting My Sharp Tv?
To hide the cables when wall mounting your Sharp TV, use cable management solutions like wall channels, raceways, or in-wall cable concealment kits.
Conclusion
Wall-mounting a Sharp TV involves careful planning, precise measurements, and attention to detail. By following these steps and referring to your TV and wall mount kit’s user manuals, you can safely and securely mount your Sharp TV on the wall, creating an aesthetically pleasing and functional entertainment setup. If you are unsure about any aspect of the installation, it’s always a good idea to seek assistance from a professional installer to ensure a safe and successful wall-mounting process.