Installing a TV wall mount is a fantastic way to free up space, enhance the aesthetics of a room, and create a more immersive viewing experience. However, the process of mounting a TV on the wall might seem daunting to many. With the right guidance and a few essential tools, though, it can be a manageable DIY project. In this comprehensive guide, we will take you step by step through the process of how to install a TV wall mount. Whether you’re a seasoned DIY enthusiast or a beginner looking to tackle your first home improvement project, by the end of this guide, you’ll have the knowledge and confidence to securely mount your TV on the wall and transform your entertainment setup. So, let’s get started and learn how to bring that sleek, cinematic look to your living space.
Choosing The Right Wall Mount
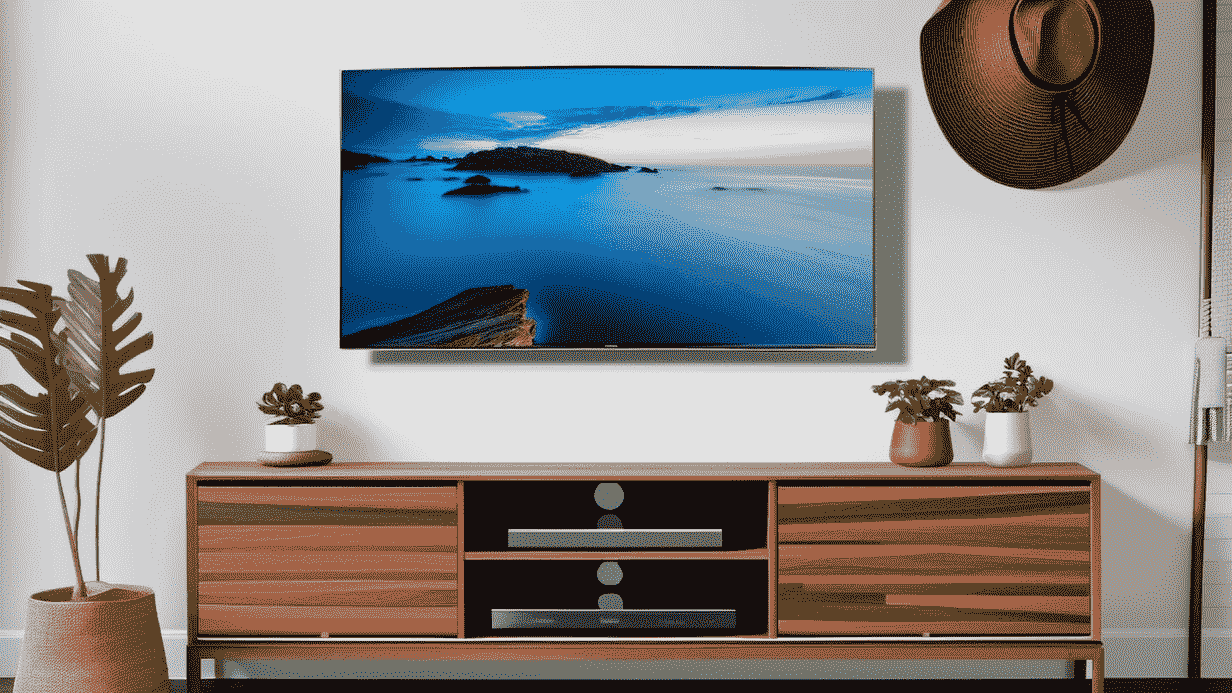
Finding the right wall mount for your TV installation can be a breeze. Learn how to effortlessly set up and install your TV wall mount with these simple steps.
When it comes to mounting your TV on the wall, choosing the right wall mount is crucial. A well-suited wall mount ensures that your TV is securely positioned for optimal viewing pleasure. There are different types of TV wall mounts available in the market, each with its own set of advantages.
In this section, we will discuss the three most common types of wall mounts: fixed, tilting, and full-motion (articulating) wall mounts. Additionally, we will explore the factors to consider when making this important decision.
Types Of Tv Wall Mounts:
- Fixed wall mount:
- Ideal for rooms where the seating arrangement is centered directly in front of the TV.
- This type of mount keeps the TV flush against the wall, offering a sleek and streamlined appearance.
- It provides a low-profile solution and is suitable for smaller spaces or when you prefer a minimalist look.
- Tilting wall mount:
- Allows you to adjust the tilt angle of the TV vertically.
- Perfect if you want to mount your TV at a higher position on the wall.
- The adjustable tilt feature ensures better visibility by reducing glare from lights or windows.
- Full-motion (articulating) wall mount:
- Provides the most flexibility in terms of positioning your TV.
- Allows you to extend, swivel, and tilt the TV in multiple directions.
- Ideal for rooms where you want to have the freedom to adjust the viewing angle according to your seating position.
Factors To Consider When Choosing A Wall Mount:
- TV size and weight compatibility:
- Determine the weight and size of your TV to ensure the wall mount can handle its dimensions.
- Check the wall mount specifications for the recommended weight and size capacity.
- Compatibility with VESA mounting pattern:
- VESA (Video Electronics Standards Association) mounting pattern refers to the standardized hole pattern on the back of your TV.
- Verify if the wall mount’s VESA compatibility matches your TV’s mounting pattern to ensure a secure fit.
- Wall material and stud spacing:
- Consider the type of wall material (drywall, brick, concrete, etc.) In your room.
- Ensure that you have the appropriate tools and mounting hardware to properly secure the mount onto your specific wall material.
- Check the stud spacing in your wall to ensure proper alignment and stability when mounting the TV.
- Viewing angle and height:
- Determine the ideal viewing angle and height for your TV based on your seating arrangement.
- Take measurements and make adjustments accordingly to ensure comfortable viewing for everyone in the room.
Choosing the right wall mount will enhance your TV viewing experience and ensure the safety and stability of your mounted TV. Consider the type of mount that suits your needs, along with the factors such as TV size and weight compatibility, VESA mounting pattern, wall material and stud spacing, as well as the desired viewing angle and height.
With careful consideration and proper installation, you’ll be able to enjoy your favorite shows and movies in style and comfort.
Gathering The Necessary Tools And Equipment
To install a TV wall mount, gathering the necessary tools and equipment is crucial. Ensure you have a stud finder, level, power drill, screwdriver, and mounting kit to securely mount your TV for an ideal viewing experience.
Before you embark on the process of installing a TV wall mount, it’s important to gather all the necessary tools and equipment. Having everything on hand beforehand will make the installation process smoother and more efficient. Here are the essential tools and equipment you’ll need:
Tools Needed For Tv Wall Mount Installation:
- Stud finder: Use a stud finder to locate the wooden beams in your wall. This will ensure a secure and stable installation.
- Level: A level will help you align the TV mount accurately, ensuring that your TV hangs straight on the wall.
- Power drill and drill bits: You’ll need a power drill to make holes in the wall for the mount and for any other installation purposes.
- Screwdriver: Have a screwdriver on hand for tightening screws and making necessary adjustments during the installation process.
Equipment Required For Tv Wall Mount Installation:
- Wall mount kit: Purchase a suitable wall mount kit that matches the specifications of your TV. It should include all the necessary brackets and hardware for installation.
- Mounting hardware: Ensure that you have all the required screws, bolts, and washers included in the wall mount kit. These will be used to secure the TV mount to the wall.
- HDMI cables: As part of the installation process, you’ll need HDMI cables to connect your TV to various devices such as gaming consoles, Blu-ray players, or cable boxes.
- Cable management solutions: Invest in cable management solutions such as cable clips or adhesive cable ties. These will help organize and conceal the TV’s power and HDMI cables, giving your installation a neat and tidy appearance.
Having these tools and equipment ready will make your TV wall mount installation process much more convenient and efficient. Proper preparation will ensure a secure installation and allow you to enjoy your TV viewing experience without any worries. So, let’s move on to the next step in our guide and get your TV mounted on the wall!
Preparing The Wall And Tv For Installation
To install a TV wall mount, you need to properly prepare the wall and TV. Follow these steps for a successful installation.
Locating Wall Studs
- Before you start installing your TV wall mount, locate the wall studs as they provide the necessary support for your TV.
- You can locate wall studs using a stud finder, which is a handy tool designed for this purpose.
- Start by placing the stud finder against the wall and then slowly moving it horizontally until it detects a stud.
- Once the stud is detected, the stud finder will emit a sound or display a light indicating the presence of the stud.
Identifying Stud Spacing
- After locating the first stud, measure and mark its position on the wall.
- Studs are typically spaced 16 inches apart in most construction, but it may vary, so it’s essential to identify the stud spacing in your specific wall.
- Use a tape measure to measure the distance between the center of the first stud and the center of the next stud.
- Repeat this process along the wall to identify the spacing between each stud.
Marking The Mounting Holes On The Wall
- To ensure accurate placement of the TV wall mount, mark the mounting holes on the wall.
- Align the TV wall mount with the studs and place it at the desired height on the wall.
- Use a pencil to mark the mounting hole positions on the wall through the holes in the TV wall mount.
- Double-check the markings to ensure they are level and aligned with the stud spacing.
Removing The Tv Stand Or Existing Wall Mount
- If your TV is already mounted on a stand or existing wall mount, you will need to remove it before installing the new TV wall mount.
- Most TV stands have screws or brackets securing them to the TV. Unscrew these screws or release the brackets to detach the TV from the stand.
- For existing wall mounts, remove the screws holding the TV in place and carefully detach it from the mount.
- Be cautious while removing the TV stand or existing wall mount to avoid any damage to the TV or surrounding area.
Planning Cable Management And Routing
- Before proceeding with the installation, plan how you will manage and route the cables for a clean and organized setup.
- Consider the location of power outlets, audio/video connections, and any other necessary cables.
- Determine the best route for the cables to minimize visibility and potential tangling.
- Use cable clips or cable management solutions to secure the cables along the wall or behind the TV for a neat arrangement.
Installing a TV wall mount requires careful preparation to ensure a secure and aesthetically pleasing setup. By locating wall studs, identifying stud spacing, marking the mounting holes, removing the TV stand or existing wall mount, and planning cable management and routing, you can lay the groundwork for a successful installation.
Remember to follow the manufacturer’s instructions for your specific TV wall mount to ensure proper installation. With these steps completed, you’ll be ready to proceed with the actual installation of the TV wall mount.
Assembling The Wall Mount Bracket:
- Begin by unpacking the contents of the TV wall mount kit.
- Identify the different parts of the wall mount bracket, including the mounting plate, bracket arms, screws, and spacers.
- Follow the manufacturer’s instructions to assemble the bracket properly, ensuring all components are securely attached.
Attaching The Bracket Arms:
- Once the wall mount bracket is assembled, locate the bracket arms and attach them securely to the back of your TV.
- Make sure to align the arms with the VESA mounting holes on the TV and tighten the screws to hold them firmly in place.
- Double-check that the bracket arms are level and properly aligned with each other.
Mounting Plate Orientation:
- Determine the desired height for your TV by considering factors such as seating position and eye level.
- Hold the mounting plate against the wall at the desired height and use a level to ensure it is perfectly horizontal.
- Mark the positions for the screw holes on the wall, keeping in mind the dimensions provided in the instructions for your specific wall mount bracket.
Securing The Wall Mount Bracket To The Wall:
- Drill pilot holes at the marked positions using an appropriate drill bit, taking care to avoid any electrical wiring or plumbing behind the wall.
- Insert wall anchors into the pilot holes for added stability and to ensure the screws hold securely in different types of wall surfaces.
- With the help of a friend or family member, hold the mounting plate against the wall and attach it using the provided screws, ensuring they are tightened adequately to support the weight of your TV.
Using The Appropriate Screws And Anchors:
- When choosing screws and anchors, consider the type of wall you have, whether it’s drywall, concrete, or wood. Refer to the manufacturer’s instructions for specific recommendations.
- Secure the wall mount bracket to the wall using the appropriate screws and anchors, following the instructions closely for a safe and secure installation.
Ensuring Proper Alignment And Level Installation:
- Once the wall mount bracket is securely attached to the wall, carefully lift your TV and align the bracket arms with the mounting plate.
- Gently lower the TV onto the bracket arms, ensuring that it rests securely and evenly.
- Use a level to check if the TV is properly aligned and adjust the bracket arms if necessary to achieve a level installation.
- Finally, double-check that all the screws are tightened, providing a secure and stable mounting for your TV.
By following these step-by-step instructions, you can successfully mount your TV wall bracket and enjoy a fantastic viewing experience in no time. Remember, taking the time to ensure a proper and secure installation will provide peace of mind and longevity to your wall-mounted TV arrangement.
Preparing The Tv For Installation
- Before attaching your TV to the wall mount, ensure that it is turned off and unplugged from any power source.
- Place a soft and clean cloth on a flat surface to protect the screen while working on the installation.
Detaching Any Necessary Components Or Cables
- If there are any components or cables attached to your TV that might interfere with the installation process, such as a soundbar or cords connected to the back panel, detach them carefully.
Identifying The Vesa Mount Pattern
- Locate the VESA mount pattern on the back of your TV. This pattern consists of evenly spaced holes that correspond to the mounting holes on the wall mount bracket.
- Measure the distance between the holes horizontally and vertically to determine the VESA mount pattern size, for example, 200mm x 200mm or 400mm x 400mm.
Aligning And Connecting The Tv To The Wall Mount Bracket
- Lift your TV carefully and align its mounting holes with the corresponding holes on the wall mount bracket.
- Slowly lower the TV onto the bracket, ensuring that the holes are aligned correctly.
Using The Recommended Screws And Spacers
- Use the screws provided with the wall mount bracket and tighten them into the mounting holes on the TV. Ensure that they are securely fastened but avoid over-tightening, as this could damage the TV.
- If your TV requires spacers, insert them between the wall mount bracket and the TV to achieve a flush and secure fit.
Securing The Tv To The Bracket
- Double-check that all screws are tightened securely, ensuring the TV is firmly attached to the wall mount bracket. A loose connection can lead to instability and potential damage.
- Briefly test the stability by gently rocking the TV to ensure it is securely fastened.
Verifying The Stability And Levelness Of The Tv
- Once the TV is attached to the wall mount, take a step back and visually verify that it appears level.
- Use a bubble level to ensure the TV is properly aligned. Adjust the position of the TV if necessary.
Following these steps will ensure a successful installation of your TV wall mount. Now you can enjoy a sleek and space-saving setup for your television.
Cable Management And Final Adjustments
Learn how to install a TV wall mount with proper cable management and final adjustments for a sleek and organized setup. Follow these steps for a clean installation and optimize your viewing experience.
Organizing And Concealing Cables:
Managing cables properly not only improves the aesthetic appeal of your TV wall mount installation but also prevents potential hazards and tangles. Here are some effective ways to organize and conceal those unsightly cables:
- Use cable channels or cord covers: These products are designed to hide cables by neatly routing them along the wall or behind furniture. Simply attach the channel or cord cover to the wall with screws or adhesive, and place the cables inside. This ensures a clean and clutter-free look.
- Utilize cable ties or adhesive hooks: Cable ties are a simple yet effective way to bundle and secure multiple cables together. This prevents them from hanging loosely and tangling. On the other hand, adhesive hooks can be attached to the wall, allowing you to route cables along the hooks for a neat and organized appearance.
Making Final Adjustments To The Tv Position:
After installing the TV wall mount and concealing the cables, it’s time to make those final adjustments to ensure the best viewing experience:
- Tilting or swiveling the TV as needed: Depending on your seating arrangement and room layout, you might need to adjust the tilt or swivel of the TV. This allows you to achieve the optimal viewing angle, ensuring a comfortable and immersive experience.
- Checking for optimal viewing angles and glare reduction: Position yourself in different spots within the room and assess the TV’s visibility from each location. Adjust the TV’s angle accordingly to minimize glare from windows or other sources of light. This will help enhance picture quality and reduce eye strain.
Remember, proper cable management and final adjustments are crucial for a seamless TV wall mount installation. Take the time to organize and conceal cables, and make the necessary adjustments to optimize your viewing experience. Now you can sit back, relax, and enjoy your favorite shows and movies in style!
Enjoying Your Newly Mounted Tv
Congratulations! You have successfully installed your TV wall mount and now it’s time to sit back, relax, and enjoy your newly mounted TV. Before diving into your favorite shows and movies, there are a few things you should do to ensure the functionality and optimal viewing experience.
Follow the steps below to fully enjoy your mounted TV.
Testing The Functionality And Connections
Before settling in for a binge-watching session, it’s important to test the functionality of your TV and ensure all the connections are properly established. Here’s how:
- Power on your TV and check if it turns on without any issues.
- Test the remote control to make sure it’s working properly. Ensure that you can navigate through the menu and adjust the volume.
- Check the HDMI connections between your TV and any connected devices, such as a cable box or gaming console. Make sure they are securely plugged in and providing a stable signal.
- Verify that the wall mount is securely holding your TV in place. Gently push and pull the TV to ensure it’s stable and not wobbly.
Connecting Av Devices And Accessories
To enhance your TV viewing experience, you may want to connect various AV devices and accessories. Follow these steps to make the necessary connections:
- Connect your cable or satellite box to your TV using an HDMI cable. This will enable you to access all your favorite channels and watch live TV.
- If you have a DVD or Blu-ray player, connect it to your TV using an HDMI cable or component cables.
- To enhance your audio experience, connect a soundbar or surround sound system to your TV using an optical cable or HDMI ARC (Audio Return Channel).
- If you enjoy gaming, connect your gaming console to your TV using an HDMI cable. This will allow you to play games on a larger screen with better visuals.
Checking For Signal Quality And Audio/Video Output
To ensure you’re getting the best audio and video quality from your newly mounted TV, follow these steps:
- Tune your TV to a channel or input source that displays video content. Pay attention to the clarity of the image, ensuring it’s sharp and not pixelated.
- Adjust the picture settings on your TV to optimize the brightness, contrast, and color levels according to your preference.
- Play a video with sound and make sure the audio is clear and in sync with the visuals. Adjust the volume to a comfortable level.
Sit back, relax, and enjoy your favorite shows and movies. With your TV properly mounted and connected, you can now immerse yourself in a captivating entertainment experience. Whether it’s a thrilling movie, a captivating TV series, or a competitive gaming session, your newly mounted TV will bring it all to life.
Happy watching!
Frequently Asked Questions For How To Install Tv Wall Mount?
Can I Install A Tv Wall Mount Myself?
Yes, you can install a TV wall mount yourself! Just follow the instructions carefully.
Do You Need A Stud For A Tv Wall Mount?
Yes, you need a stud for a TV wall mount to ensure proper stability and secure installation.
Can A Tv Be Mounted On Any Wall?
Yes, a TV can be mounted on any wall.
Do You Need Drywall Anchors For Tv Mount?
Yes, you need drywall anchors for a TV mount to ensure proper stability and secure installation.
Conclusion
To sum it up, installing a TV wall mount can be a straightforward process if you follow the right steps. By gathering the necessary tools and measuring your wall and TV correctly, you can ensure a secure and aesthetically pleasing installation.
Remember to locate the studs before drilling and use a level to ensure the mount is straight. Don’t rush the process – take your time to ensure everything is securely fastened. This will prevent any accidents or damage to your precious TV.
Whether you’re a DIY enthusiast or a novice, with a little patience and some basic tools, you can successfully install a TV wall mount and enjoy a more enjoyable viewing experience. So why wait? Get started on transforming your living space today!