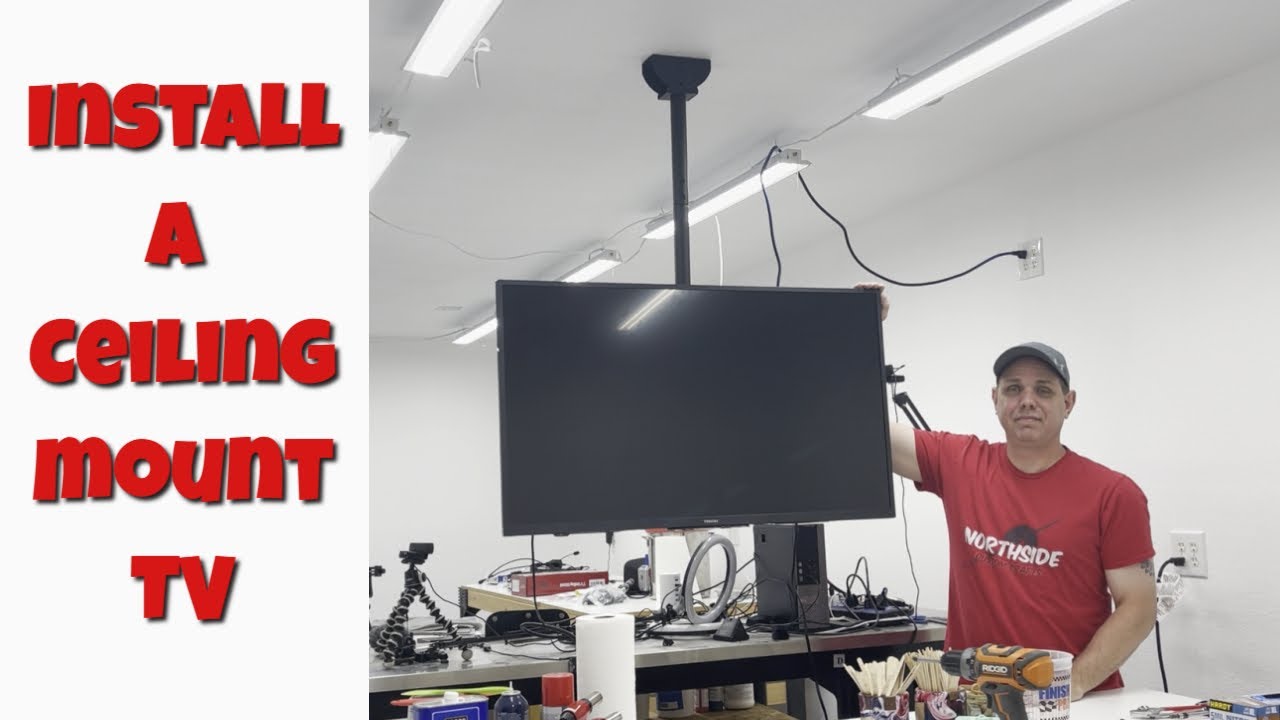
Installing a ceiling TV wall mount can be a fantastic way to save space and create a unique viewing experience in your home. Whether you want to free up wall space or position your TV in a way that complements your room’s layout, a ceiling mount offers versatility and style.
In this guide, I’ll take you through the essential steps and tips to help you successfully install a ceiling TV mount, turning your ceiling into a prime spot for entertainment.
Planning Your Ceiling Tv Wall Mount Installation
Follow these simple steps for a seamless installation process.
Assessing The Space And Finding The Ideal Location For Your Tv Wall Mount
Finding the perfect spot for your ceiling TV mount installation requires careful consideration of the space and ensuring it meets your viewing needs. Here are some important factors to keep in mind:
- Ceiling height: Measure the distance between the floor and the ceiling to determine if it provides a comfortable viewing experience. Ideally, the TV should be at eye level when seated in the desired viewing area.
- Structural support: Identify the ceiling joists or beams to ensure they can support the weight of the TV and the mount. Stud finders are useful tools for locating these hidden supports.
- Wiring and cabling: Take note of any existing electrical outlets or cable connections to avoid obstructing them with the TV and mount. It may be necessary to re-route or extend cables for a cleaner installation.
- Viewing angles: Consider the optimal viewing angles for the intended seating positions. Avoid mounting the TV too close to walls or obstacles that may limit the viewing range.
- Room layout: Assess the overall layout of the room to ensure that the mounted TV does not obstruct any doors, windows, or other essential features.
- Ambient lighting: Take into account the natural and artificial lighting in the room. Avoid placing the TV in direct sunlight or in areas with excessive glare to enhance the viewing experience.
Checking The Compatibility Of The Ceiling Structure With The Weight Of Your Tv
Before installing a ceiling TV mount, it is important to ensure that your ceiling structure can support the weight of your TV. Here are some steps to follow:
- Determine the weight of your TV: Check the TV’s specifications or user manual for its weight. This information will be crucial in determining the ceiling mount’s suitability.
- Locate ceiling joists: Use a stud finder to locate the ceiling joists. These are strong beams that provide support to the ceiling. Make sure your desired TV mounting location aligns with at least one joist.
- Confirm the joist’s position: Once you’ve found a joist, use a small nail or awl to confirm its position. This will help avoid any surprises when drilling or installing the ceiling TV mount.
- Calculate the load-bearing capacity: Consult an engineer or refer to building codes to determine the load-bearing capacity of the ceiling joists. Compare this with the weight of your TV to ensure compatibility.
- Consider additional reinforcements: If your TV exceeds the load-bearing capacity of the joists, you may need to reinforce the ceiling with additional beams or bracing. Consult a professional for guidance on how to proceed.
- Consult a structural engineer, if necessary: If you have any doubts about the structural integrity of your ceiling, it’s best to consult a structural engineer. They can assess the situation and provide recommendations for safely installing the ceiling TV mount.
Keep in mind that these steps are general guidelines. The specific requirements will vary depending on your ceiling structure and TV model. Always prioritize safety and consult professionals if needed to ensure a secure installation.
Gathering The Necessary Tools And Materials
Before you begin installing a ceiling TV mount, it’s important to gather all the necessary tools and materials. This will ensure a smooth and efficient installation process. Here’s a checklist of everything you’ll need:
- Stud finder: A stud finder is crucial for locating the wooden studs in your ceiling, which will provide the necessary support for the TV mount.
- Drill: You’ll need a drill to create holes in the ceiling for mounting the TV bracket.
- Screwdriver: A screwdriver will be used to secure the TV bracket to the ceiling.
- Level: A level will help ensure that the TV mount is installed straight and level.
- Tape measure: Measuring tape will be needed to accurately determine the placement of the TV mount.
- Pencil: A pencil can be used to mark the spots where you’ll be drilling holes and mounting the TV bracket.
- Ladder: A sturdy ladder will allow you to easily reach the ceiling and safely install the TV mount.
- TV mount kit: Be sure to have the TV mount kit that includes all the necessary mounting hardware for your specific TV.
- Safety goggles and gloves: It’s always a good idea to wear safety goggles and gloves to protect yourself during the installation process.
Once you’ve gathered all the tools and materials mentioned above, you’ll be well-prepared to install a ceiling TV mount.
Preparing The Ceiling For Tv Wall Mount Installation
Learn how to properly prepare your ceiling for TV mount installation with this step-by-step guide. Get expert tips and ensure a secure and stable setup for your ceiling-mounted TV.
Installing The Ceiling Tv Mount
When it comes to installing a ceiling TV mount, it’s important to follow the manufacturer’s instructions carefully. This will ensure that the mount is assembled correctly, securely attached to the ceiling, and able to support your TV. In this section, we’ll walk you through the step-by-step process of installing a ceiling TV mount, including assembling the mount, marking and drilling holes in the ceiling, and securing the mount using appropriate screws and anchors.
Let’s get started!
Assembling The Ceiling Mount According To The Manufacturer’S Instructions:
To ensure a successful installation, it’s crucial to assemble the ceiling mount according to the manufacturer’s instructions. Here are the steps to follow:
- Start by unpacking the ceiling mount and identifying all the necessary components.
- Lay out the parts and refer to the instruction manual or guide that came with the mount.
- Familiarize yourself with the different pieces and their functions.
- Follow the provided diagrams or step-by-step instructions to properly assemble the mount.
- Tighten all the screws and connections securely, ensuring that the mount is sturdy and stable.
Remember, each ceiling mount may have different specifications and assembly instructions, so it’s crucial to carefully follow the manufacturer’s guidelines.
Marking And Drilling Holes In The Ceiling For The Mount:
Before securing the mount to the ceiling, you’ll need to mark and drill the required holes. Here’s what you need to do:
- Determine the desired location for your TV and mark the spot on the ceiling.
- Use a stud finder to locate any ceiling joists or beams. It’s best to attach the mount to these structural elements for added stability.
- If a stud is not conveniently located, consider alternative methods such as using toggle bolts or wall anchors.
- If there are no beams or joists in the desired location, you’ll need to use appropriate anchors.
- Use a pencil or marker to mark the hole locations on the ceiling.
- Double-check the measurements and make sure they align with the mount’s specifications.
- Once the markings are in place, use a drill with the appropriate drill bit to create the holes in the ceiling.
Securing The Mount To The Ceiling Using Appropriate Screws And Anchors:
Now it’s time to secure the mount to the ceiling. Follow these steps:
- Insert the appropriate screws or bolts through the mounting holes in the ceiling mount.
- If you’re attaching the mount to ceiling joists or beams, align the holes with those marks and screw them in tightly.
- If you’re using anchors, insert them into the pre-drilled holes and secure them according to their instructions.
- Ensure that the mount is level and aligned with your markings.
- Tighten the screws or bolts securely, using a screwdriver or wrench as needed.
- Give the mount a gentle shake to check for stability. It should be firmly attached to the ceiling without any wobbling.
Congratulations! You have successfully installed the ceiling TV mount. Now you can proceed to mount your TV and start enjoying your favorite shows and movies from a new perspective.
Mounting The Tv Onto The Ceiling Mount
Attaching the mounting bracket to the back of the TV securely:
- First, locate the mounting holes at the back of your TV. These are typically found near the center of the TV panel.
- Place the mounting bracket over the holes, ensuring that it aligns correctly and evenly.
- Once aligned, use the provided screws and a screwdriver to securely attach the mounting bracket to the TV.
- Tighten the screws just enough to secure the bracket, but be cautious not to overtighten and potentially damage the back of your TV.
Connecting the TV and mount using the provided hardware:
- With the mounting bracket securely attached to the TV, carefully lift the TV and align it with the ceiling mount.
- The ceiling mount should have corresponding brackets or hooks to hold the TV.
- Gently slide the TV onto the ceiling mount, ensuring that it fits snugly into place.
- Use the provided hardware to secure the TV to the ceiling mount. This may involve tightening screws or using other locking mechanisms as instructed in the manufacturer’s guidelines.
Testing the stability and adjustability of the mounted TV:
- Once the TV is securely mounted, it’s essential to test its stability and adjustability.
- Give the TV a gentle shake to ensure that it is firmly in place and doesn’t wobble.
- Check if the mounted TV can be easily adjusted to achieve the desired viewing angle.
- In case the TV seems unstable or the adjustability is not as expected, review the installation steps to ensure all screws are tightened securely and that the ceiling mount is installed correctly.
Managing Cables And Wiring
Learn how to efficiently manage cables and wiring while installing a ceiling TV mount. This step-by-step guide will help you avoid clutter and ensure a clean and organized installation process.
Concealing And Organizing The Cables For A Neat Appearance:
Managing the cables and wiring is a crucial step in installing a ceiling TV mount. Properly concealing and organizing the cables not only enhances the overall appearance of the setup but also helps ensure a safe and clutter-free environment. Here are some effective ways to achieve a neat and professional look:
- Routing the cables through the ceiling: By running the cables through the ceiling, you can keep them completely out of sight, providing a clean and seamless look. This method requires drilling holes in the ceiling and fishing the cables through them. Here’s how you can do it:
- Measure and mark the locations where you want the cables to come out on the ceiling.
- Use a stud finder to locate any joists in the ceiling that you need to avoid when drilling the holes.
- Drill holes at the marked points, making sure they are large enough to accommodate the cables.
- Carefully thread the cables through the holes, ensuring they are properly secured and not dangling.
- Utilizing cable management solutions: Another way to achieve a tidy cable setup is by using cable management solutions. These tools help you organize and conceal the wires effectively. Consider the following options:
- Cable raceways: These are self-adhesive plastic channels that can be mounted on the wall or ceiling. They provide a dedicated space for your cables, keeping them hidden and protected.
- Cable sleeves: These flexible sleeves wrap around the cables, creating a unified and streamlined appearance. They are particularly useful when you have multiple cables running together.
- Cable clips: These small clips can be attached to the wall or ceiling to hold the cables in place, preventing them from hanging loosely.
- Organizing the cables behind furniture: If you have furniture such as a TV stand or a shelf beneath the ceiling TV mount, you can strategically position it to hide the cables. Make sure to secure the cables neatly behind the furniture using cable ties or adhesive clips.
- Avoiding excessive bends and twists: While routing the cables, ensure they do not have excessive bends or twists that can cause signal degradation. Maintaining smooth cable paths will not only guarantee better signal transmission but also contribute to a more organized appearance.
- Labeling the cables: To easily identify and manage the different cables, consider labeling them accordingly. Attach small labels or use colored markers to differentiate between power cords, HDMI cables, and other connections. This labeling practice will save you time when troubleshooting or making adjustments in the future.
Fine-Tuning The Tv Position And Angle
Once you have successfully installed your ceiling TV mount, the next step is to fine-tune the position and angle of your TV for optimum viewing experience. This is an important step to ensure that you can enjoy your favorite shows and movies without any discomfort.
In this section, we will discuss how to adjust the tilt and swivel settings of your TV and ensure that it is level and centered within the room.
Adjusting The Tilt And Swivel Settings To Achieve The Desired Viewing Angle:
- Tilt adjustment: Depending on your viewing preferences, you may want to adjust the tilt of your TV. Follow these steps to achieve the desired tilt angle:
- Locate the tilt adjustment mechanism on your ceiling TV mount.
- Use a wrench or screwdriver to loosen the tilt adjustment screws.
- Gently tilt the TV up or down to the desired angle.
- Tighten the tilt adjustment screws to secure the TV in place.
- Swivel adjustment: If you need to change the viewing angle horizontally, the swivel adjustment allows you to do so. Here’s how to adjust the swivel settings of your TV:
- Locate the swivel adjustment mechanism on your ceiling TV mount.
- Loosen the swivel adjustment screws using a wrench or screwdriver.
- Carefully swivel the TV left or right until you achieve the desired angle.
- Tighten the swivel adjustment screws to lock the TV in place.
Ensuring The Tv Is Level And Centered Within The Room:
- Leveling the TV: A perfectly level TV enhances the visual experience and prevents any discomfort. Follow these steps to ensure your TV is level:
- Use a level tool to determine if the TV is properly aligned.
- If the TV is not level, adjust the mounting brackets accordingly.
- Double-check the levelness and make any necessary adjustments until the TV is perfectly level.
- Centering the TV within the room: It is important to position your TV at the center of the room for an immersive viewing experience. Here’s how you can achieve this:
- Measure the width of the room and mark the center point on the ceiling.
- Measure the width of your TV and mark the center point on the back.
- Align the center point of the TV with the center point on the ceiling.
- Adjust the positioning of the TV mount if needed to ensure it is centered within the room.
Testing And Safety Measures
Before completing the installation of your ceiling TV mount, it is essential to go through a thorough testing process and ensure that all safety measures are in place. This will help to guarantee that your TV is securely mounted and no potential risks or hazards are present.
Below are the necessary steps to follow:
- Checking all connections and functionality of the TV and mount:
- Securely attach all cables and cords to the TV and the mount, ensuring they are plugged in correctly.
- Confirm that the TV is properly connected to any devices, such as a cable box or gaming console.
- Turn on the TV and test all functions, including volume control, channel adjustment, and input selection.
- Check that the TV is detecting all connected devices and displaying their content accurately.
- Securing any loose components and verifying stability:
- Inspect the ceiling TV mount for any loose screws, bolts, or brackets. Tighten them if necessary.
- Examine the TV brackets and ensure they are securely attached to the mounting plate.
- Confirm that the mounting plate is firmly fixed to the ceiling or other support structure.
- Test the stability of the TV mount by gently shaking it. If there is any wobbling or movement, reevaluate the installation and make adjustments as required.
- Reviewing safety precautions and ensuring the installation is secure:
- Ensure that the TV mount is securely fastened to a structurally sound part of the ceiling or wall.
- Double-check that the weight capacity of the mount can handle the TV’s weight.
- Confirm that the TV is positioned at a suitable height and angle for comfortable viewing.
- Consider using safety straps or brackets to provide additional stability and prevent accidents or mishaps.
- Finally, ensure that all screws, bolts, and brackets are tightened properly to prevent the TV from falling or sliding.
By following these testing and safety measures, you can have peace of mind knowing that your ceiling TV mount installation is secure and your TV is ready for enjoyment. Remember, safety should always be a priority when dealing with any type of mount or installation.
Troubleshooting Common Issues
Installing a ceiling TV mount can be a great way to save space and improve the viewing experience in your home or office. However, it’s not uncommon to encounter a few hiccups along the way. In this section, we’ll discuss some common issues you may come across during the installation process and how to troubleshoot them effectively.
Addressing Common Problems Such As Loose Screws Or Cable Connectivity Issues:
- Loose screws: If you notice that the TV mount feels unstable or wobbly, it’s important to check the tightness of the screws. Use a screwdriver to tighten them securely, ensuring that the mount is properly anchored to the ceiling. This will provide the stability needed for a secure TV installation.
- Cable connectivity issues: A common problem many people face is difficulty connecting cables to the TV mount. Ensure that you are using the correct cables for your TV and that they are securely connected to their respective ports. If you find that the cables are too short or tangled, consider using cable management solutions such as zip ties or cable clips to keep everything organized and easy to connect.
- Seeking professional assistance if necessary: In some cases, you may encounter more complex issues or lack the expertise or tools required to troubleshoot them effectively. If you’re unsure about any aspect of the installation process or encounter difficulties that you can’t resolve on your own, it’s always a good idea to seek professional assistance. They have the knowledge and experience to address any issues and ensure a successful installation.
Remember, troubleshooting common issues during the installation of a ceiling TV mount is crucial to ensure a safe and effective setup. By addressing loose screws, cable connectivity issues, and seeking professional help when needed, you can enjoy your TV viewing experience hassle-free.
Final Tips And Recommendations
Cleaning And Maintaining The Mounted Tv For Optimal Performance And Longevity
- Dust the surface of the mounted TV regularly using a microfiber cloth to prevent buildup and ensure a clear, vibrant display.
- Avoid using harsh cleaning chemicals or abrasive materials that can damage the screen. Instead, use a gentle cleaning solution specifically designed for electronics.
- Clean the mount itself using a damp cloth to remove any dirt or grime that may accumulate over time.
- Check the connections and cables periodically to ensure they are secure and functioning properly. Loose connections can lead to poor image quality or intermittent display issues.
- Be mindful of the temperature and humidity in the room where the TV is mounted. Extreme conditions can affect the performance and lifespan of the device.
- Consider investing in a surge protector to protect the TV from power fluctuations or electrical surges.
- Keep the area around the TV mount tidy and free from clutter, as objects placed too close to the TV can obstruct ventilation and cause overheating.
Exploring Additional Features And Accessories To Enhance Your Tv Mounting Experience.
- Opt for a full-motion mount that allows you to adjust the viewing angle and position of the TV for the best viewing experience.
- Consider installing a cable management system to hide unsightly wires and cables, creating a clean and organized look.
- Explore soundbar mounts that can be attached to the TV mount, providing an integrated audio solution and saving space.
- Enhance your viewing experience with a universal remote control that can consolidate all your entertainment devices into one easy-to-use device.
- Install a TV mount with a built-in tilt function to reduce glare and improve the visibility of the screen in brightly lit rooms.
- Invest in a TV mount with a locking mechanism or anti-theft feature to ensure the security of your valuable TV.
- If you have multiple TVs in different rooms, explore the option of using a swivel mount that allows you to rotate the TV to different areas, maximizing viewing angles.
By following these tips and exploring additional features and accessories, you can ensure your mounted TV stays clean, performs optimally, and provides an enhanced viewing experience.
Frequently Asked Questions Of How To Install A Ceiling Tv Mount
Can You Hang A Tv Mount From The Ceiling?
Yes, you can hang a TV mount from the ceiling.
How Do You Mount A Ceiling Mount?
To mount a ceiling mount, follow these steps: 1. Determine the desired location on the ceiling. 2. Use a stud finder to locate ceiling joists for secure installation. 3. Mark the mounting holes on the ceiling and drill pilot holes. 4.
Attach the ceiling mount using screws or bolts, ensuring it is securely fastened.
How Do You Hang A Tv From The Ceiling Without Studs?
To hang a TV from the ceiling without studs, use a secure ceiling mounting kit designed for this purpose.
How Much Does It Cost To Mount A Tv On The Ceiling?
The cost of mounting a TV on the ceiling varies depending on the complexity of the installation and any additional services.
How Do I Choose The Right Ceiling Tv Mount?
To choose the right ceiling TV mount, consider the weight and size of your TV, ceiling height, and installation location.
Can I Install A Ceiling Tv Mount Myself?
Yes, you can install a ceiling TV mount yourself by following the manufacturer’s instructions and using the right tools.
What Tools Do I Need To Install A Ceiling Tv Mount?
You will need a stud finder, drill, screwdriver, level, measuring tape, and an adjustable wrench to install a ceiling TV mount.
How Much Weight Can A Ceiling Tv Mount Hold?
The weight capacity of a ceiling TV mount varies, so check the product specifications to ensure it can support your TV’s weight.
How High Should I Install A Ceiling Tv Mount?
The optimal height for a ceiling TV mount is typically at eye level when seated, but it may vary depending on your personal preference.
Can I Install A Ceiling Tv Mount On A Sloped Ceiling?
Yes, there are ceiling TV mounts available specifically designed for sloped ceilings, allowing you to achieve the desired angle.
Conclusion
Installing a ceiling TV mount is a practical and efficient way to maximize your space and enhance your viewing experience. By following the step-by-step instructions outlined in this blog post, you’ll be able to successfully complete this project on your own.
Remember to choose a suitable location, locate the ceiling studs, and use the appropriate tools to ensure a secure installation. Additionally, make sure to check the weight capacity of the mount to ensure it can support your TV. As you embark on this DIY project, keep in mind that safety is paramount.